In a world where electronic devices permeate every aspect of our lives, from communication and entertainment to work and daily tasks, encountering issues with these devices is almost inevitable. At some point, you might have faced the frustration of a malfunctioning smartphone, a glitchy computer, or a home appliance that refuses to cooperate. When these electronic devices present problems, being equipped with the knowledge and skills to diagnose and potentially repair them becomes immensely valuable.
Diagnosing electronics issues might seem daunting, especially if you lack a technical background. However, it’s essential to remember that not all problems require a deep understanding of circuitry or complex algorithms. Often, a systematic and logical approach coupled with a basic understanding of how electronic devices function can go a long way in identifying and even resolving issues.
This introductory guide aims to demystify the process of diagnosing electronics issues. Whether you’re a hobbyist who enjoys tinkering with gadgets, a professional in the field of electronics, or simply someone who wants to be more self-reliant when their devices act up, this guide will provide you with fundamental insights into approaching electronics troubleshooting.
We will begin by emphasizing the significance of observation and information gathering. Just as a doctor listens to a patient’s symptoms before making a diagnosis, understanding the behavior of your electronic device is crucial. We will explore how to interpret error messages, peculiar sounds, and unusual visual cues, all of which can offer valuable clues about the underlying problem.
Moving forward, we will delve into the concept of “divide and conquer.” This technique involves breaking down the device’s functionality into manageable segments to pinpoint where the issue might be originating. By isolating specific components or subsystems, you can systematically narrow down the root cause of the problem.
In addition to these approaches, we’ll discuss the importance of documentation. Keeping track of changes you’ve made, parts you’ve replaced, or actions you’ve taken during troubleshooting can provide a roadmap not only for your own reference but also for seeking help from others if needed.
Furthermore, we’ll touch upon the invaluable resources available in the form of online communities, forums, and technical documentation. Navigating the sea of knowledge out there can greatly expedite your troubleshooting process and connect you with individuals who have encountered similar issues.
Lastly, while this guide will equip you with the basics of diagnosing electronics issues, it’s crucial to acknowledge that not all problems can be resolved without professional intervention. Some issues might require specialized tools, advanced technical knowledge, or access to replacement parts that the average person might not possess. In such cases, knowing when to seek professional help is equally essential.
In essence, the ability to diagnose electronics issues empowers you to take charge of your devices, extend their lifespan, and potentially save money on repairs. So, whether you’re dealing with a glitchy gadget or a finicky appliance, the principles and techniques discussed in this guide will serve as a solid foundation for your electronics troubleshooting journey.
Basic Troubleshooting Steps
When your electronic devices start behaving erratically or stop working altogether, it’s natural to feel a sense of frustration. However, before rushing to replace or repair them, it’s worthwhile to go through some basic troubleshooting steps. Often, the root cause of the issue is a minor glitch or a simple oversight that can be easily addressed. Here’s a guide to the fundamental steps you can take to diagnose and potentially resolve common electronics problems:
1. Check Power Supply: Ensure that the device is properly connected to a power source and that the power source itself is functioning. Sometimes, a loose power cord, a tripped circuit breaker, or a dead battery can be the cause of seemingly complex issues.
2. Observe Symptoms: Pay close attention to the symptoms the device is exhibiting. Are there error messages, unusual sounds, or visual cues like flashing lights or abnormal displays? Understanding the symptoms can provide valuable clues about the nature of the problem.
3. Restart the Device: Believe it or not, a simple restart can often resolve many electronics issues. Power off the device, wait a few seconds, and then power it back on. This action can clear temporary glitches in the software and reset the device’s internal components.
4. Check for Updates: If the device is connected to the internet or uses software, check for available updates. Outdated software can lead to compatibility issues and unexpected behavior. Keeping your device’s software up to date can sometimes resolve these problems.
5. Isolate Components: If the device has multiple components or subsystems, try to isolate the problematic area. Disconnect any external accessories, such as peripherals or cables, and test the device’s basic functions. This can help identify whether the issue lies with the device itself or an external component.
6. Consult Documentation: Refer to the user manual or any available documentation for troubleshooting guidance. Manufacturers often provide troubleshooting tips and solutions for common issues. This can be particularly helpful if you’re encountering a problem that others have also faced.
7. Search Online Resources: The internet is a treasure trove of troubleshooting information. Search for forums, communities, or websites dedicated to the specific device or problem you’re facing. Many times, someone else has encountered the same issue and might have shared a solution.
8. Test in a Different Environment: If possible, try using the device in a different environment. Sometimes, issues can be caused by external factors such as interference or poor signal strength. Testing the device in a different location can help determine if the problem is environment-related.
9. Document Changes: As you troubleshoot, make note of any changes you make or observations you gather. This documentation can serve as a reference point if you need to seek professional help or revisit the troubleshooting process in the future.
10. Know When to Seek Help: While basic troubleshooting can resolve many issues, there are instances where professional assistance is necessary. If you’re dealing with a complex issue, a hardware malfunction, or lack the technical expertise to proceed, don’t hesitate to reach out to a qualified technician or customer support.
By following these basic troubleshooting steps, you can often identify the underlying cause of electronics issues and take appropriate action. Remember that patience and a systematic approach are key to successful troubleshooting. Whether you’re dealing with a malfunctioning computer, a glitchy smartphone, or a finicky appliance, these steps will help you navigate the world of electronics troubleshooting with confidence.
Common Electronics Issues and Diagnosis
Electronics have become an integral part of our lives, serving as the backbone of communication, entertainment, productivity, and more. However, like any complex systems, electronic devices are prone to various issues that can disrupt their functionality. Understanding and diagnosing these common electronics problems can save you time, money, and frustration. Here’s a rundown of some prevalent issues and how to diagnose them:
1. Device Not Powering On: Possible Causes: Faulty power source, defective power cable, dead battery, internal hardware issue. Diagnosis: Check the power source and cable for connectivity. If it’s a battery-powered device, ensure the battery is properly charged. Try a different power source or cable. If the device still doesn’t turn on, it might have internal hardware issues that require professional attention.
2. Screen Display Issues: Possible Causes: Dead pixels, flickering display, distorted graphics. Diagnosis: Examine the screen for physical damage or visible defects. Test the device with different content to see if the issue persists. Connect the device to an external monitor or TV to determine if the problem is with the device’s screen or its internal components.
3. Slow Performance: Possible Causes: Outdated software, insufficient memory, too many background processes. Diagnosis: Check for software updates and install them. Clear unnecessary files and applications to free up memory. Monitor the device’s task manager to identify resource-hogging processes. If the problem persists, consider upgrading hardware components if possible.
4. Connectivity Issues: Possible Causes: Wi-Fi or Bluetooth connectivity problems. Diagnosis: Verify that the device is within range of the Wi-Fi or Bluetooth signal. Restart the device and the router/access point. Check if other devices can connect to the network. For Bluetooth issues, ensure the device is discoverable and try pairing with different devices.
5. Battery Draining Quickly: Possible Causes: Background apps, screen brightness, battery health deterioration. Diagnosis: Check battery usage in the device settings to identify power-hungry apps. Adjust screen brightness and enable power-saving modes. If the battery drain remains excessive, it might be a sign of a deteriorating battery that needs replacement.
6. Software Glitches and Crashes: Possible Causes: Software bugs, conflicting apps, corrupted system files. Diagnosis: Update the device’s software to the latest version. Uninstall recently installed apps that might be causing conflicts. If the issue persists, perform a factory reset or seek guidance from the manufacturer’s support.
7. Audio Problems: Possible Causes: No sound, distorted sound, audio jack issues. Diagnosis: Ensure that the volume is turned up and not muted. Test the audio with different sources (e.g., headphones, speakers) to isolate the problem. If using an audio jack, try a different pair of headphones or speakers.
8. Overheating: Possible Causes: Dust accumulation, intensive usage, inadequate cooling. Diagnosis: Check for dust accumulation in vents and fans. Ensure the device is placed on a flat, hard surface to allow proper airflow. Limit resource-intensive tasks and consider using cooling pads for laptops.
9. Random Restarts or Freezes: Possible Causes: Overheating, software issues, hardware malfunctions. Diagnosis: Monitor the device’s temperature during usage. Update software to the latest version and ensure there are no conflicting apps. If the problem persists, it might indicate a hardware issue that requires professional attention.
10. Touchscreen Problems: Possible Causes: Unresponsive touch, inaccurate touch detection. Diagnosis: Clean the screen to remove dirt and smudges. Restart the device. If the issue continues, it could be due to a hardware problem with the touchscreen sensor.
Remember, while these steps can help you diagnose common electronics issues, some problems might be beyond your expertise to fix. In such cases, seeking professional assistance is the best course of action to ensure your device’s optimal performance and longevity.
Advanced Troubleshooting Techniques
While basic troubleshooting steps can resolve many common electronics issues, there are instances when more complex problems arise. Advanced troubleshooting techniques come into play when you’re dealing with intricate systems, obscure errors, or issues that require a deeper understanding of electronics. Here are some advanced techniques to tackle challenging problems:
1. Use Diagnostic Tools: Advanced diagnostic tools, both software and hardware, can provide in-depth insights into a device’s performance and health. Examples include system monitoring software that tracks temperature, voltage, and usage, as well as oscilloscopes and multimeters for analyzing electronic signals and voltage levels.
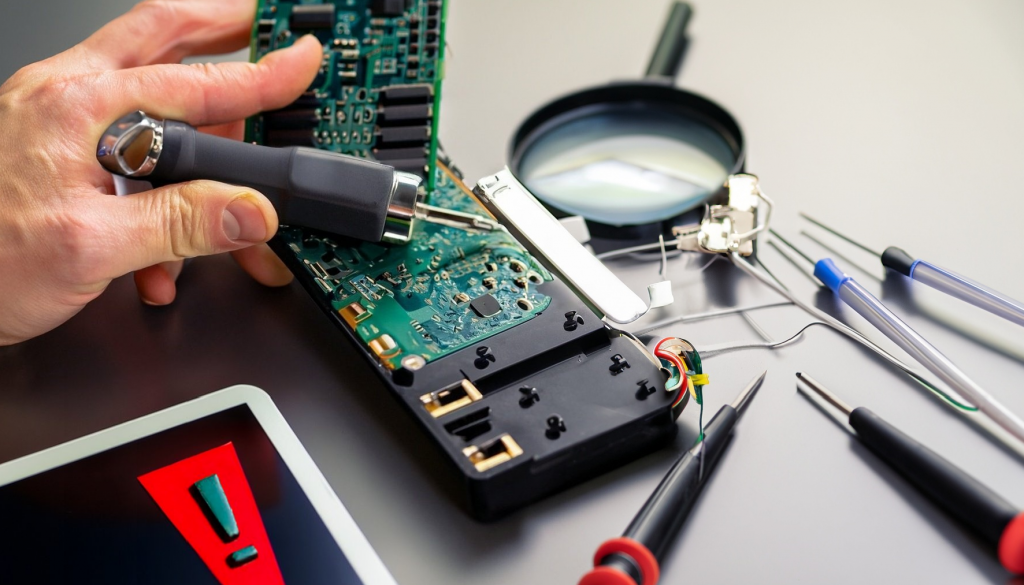
2. Check Component Level: If you’re comfortable with electronics and have the necessary tools, you can diagnose issues at the component level. This involves inspecting and testing individual components, such as capacitors, resistors, and integrated circuits, to identify faulty parts that might be causing problems.
3. Reverse Engineering: For more complex devices, reverse engineering can be employed to understand their inner workings. This involves dissecting the device, studying its circuitry, and potentially recreating a simplified version to troubleshoot and diagnose issues.
4. Firmware Analysis: Some issues stem from software, specifically firmware, which controls the device’s hardware. Advanced users can analyze and even modify firmware to identify bugs or improve performance. However, caution is needed as improper firmware changes can lead to irreparable damage.
5. Logic Analyzers and Debugging: For digital electronics, logic analyzers are indispensable tools. They help you visualize and analyze digital signals, which is crucial for diagnosing issues related to data flow, timing, and signal integrity. Debugging software and tools are also essential for identifying coding errors in software applications.
6. Signal Injection and Tracing: In cases where signals are not reaching their intended destinations, using signal injectors and tracers can help locate breaks or interruptions in the circuit. These tools allow you to inject a signal into the circuit and trace its path to pinpoint the issue.
7. Advanced Software Debugging: Advanced software debugging involves techniques like dynamic analysis, where you monitor the program’s behavior during runtime, and static analysis, where you analyze the code without executing it. Tools like disassemblers and decompilers can help you understand and potentially fix complex software issues.
8. Voltage and Current Measurements: Measuring voltage and current at various points in a circuit can provide insights into how power is flowing and whether components are functioning as expected. These measurements can help identify irregularities or points of failure.
9. Environmental Factors: Advanced troubleshooting may involve considering environmental factors, such as temperature and humidity, that can impact electronic components. Specialized testing equipment might be required to simulate extreme conditions and uncover potential vulnerabilities.
10. Collaboration and Expert Help: Don’t hesitate to seek guidance from experts, either through online communities, professional forums, or direct consultation. Collaborating with experienced individuals can help you navigate intricate issues and avoid unnecessary errors.
11. Documentation and Learning: As you explore advanced troubleshooting, document your steps, observations, and solutions. This not only helps you track your progress but also creates a valuable resource for future troubleshooting endeavors. Continuously learning about electronics, circuit theory, and programming languages enhances your troubleshooting capabilities.
12. Safety First: Remember that advanced troubleshooting often involves working with live circuits, which can pose risks. Prioritize safety by disconnecting power sources, wearing appropriate protective gear, and adhering to proper practices when handling electronics.
Advanced troubleshooting techniques require a deeper understanding of electronics, technical skills, and the right tools. These methods can be invaluable when dealing with complex issues, but it’s essential to approach them with caution and a willingness to learn.
Conclusion
In our technology-driven age, electronic devices have become indispensable, seamlessly integrating into our lives. However, even the most advanced devices can encounter issues, leading to frustration and inconvenience. This is where the skill of diagnosing common electronics issues becomes invaluable.
Throughout this exploration, we’ve journeyed through the essential steps of identifying and resolving electronic malfunctions. From the initial observation of symptoms and gathering information to systematically isolating problems and seeking appropriate solutions, the process embodies a blend of logical thinking and technical understanding.
By following basic troubleshooting steps, we can often uncover the root causes of problems like power failures, software glitches, and connectivity hiccups. This approach empowers us to regain control over our devices, promoting self-reliance and saving both time and money.
Delving into more complex scenarios, we’ve seen how advanced techniques, such as using diagnostic tools, analyzing firmware, and component-level investigations, offer insights into the inner workings of electronics. These strategies require deeper technical knowledge and specialized tools, making them valuable assets in the hands of professionals and enthusiasts alike.
Remember, the journey of diagnosing electronics issues is one of patience, observation, and continuous learning. The realm of electronics is vast and ever-evolving, meaning that new challenges and solutions are constantly emerging. Embracing the process of troubleshooting not only enhances our problem-solving abilities but also nurtures our curiosity and adaptability in the face of technological change.
Ability to diagnose common electronics issues is a skill that grants us greater control over our devices and nurtures a deeper understanding of the technologies we rely on. Whether it’s a simple glitch or a more intricate malfunction, the principles and techniques we’ve explored provide a roadmap to confidently navigate the world of electronics troubleshooting.